
Documentation
A handy citation manager
HandyCite is a bibliography management software that runs as a Microsoft Word 2007/2010 add-in.
REQUIREMENTS
1. Windows XP, Windows Vista of Windows 7
2. Microsoft Word 2007, Word 2010
Version 0.9.5.33
Citation Manager – Database Tab
Citation Manager – Options Tab
Reference Editor Taskpane Pdf Tab
Installation
1. First time. Unzip the downloaded file and run the setup.exe. It will download some Microsoft .net files, which may take some time.
2. Reinstallation/ new version. Uninstall the previously installation from windows control panel add/remove software, and then run the setup.exe from downloaded version.
Key Concepts
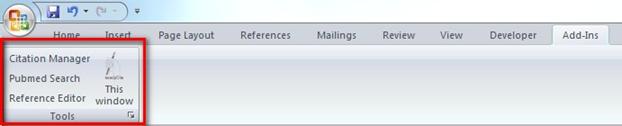
3. Embeded in Word. HandyCite runs embedded in word. There is no separate window. It will run as taskpanes within word. When installed, it will add buttons in the Add-Ins section in the word ribbon.
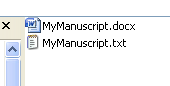
4. Reference database. HandyCite stores the references list database as text files. These database files are stored with same name (except *.txt extension) and in the same folder as the document file. Since it uses the current document name and folder, it does not ask for a database name when saving or loading a reference database file. For example if document is c:\documents\MyManuscript.docx, the database file will be c:\docuemnts\MyManuscript.txt.
The name of the reference list database gets stored as document property. So, future versions of the document maintain link to the original database file. If required, the database file can be renamed by saving as a different file name.
5. Document embedded references. References embedded in the document have complete information to regenerate the database. However, this database will only have the references embedded in the document. Database saved as text file may have references not embedded in the document.
6.
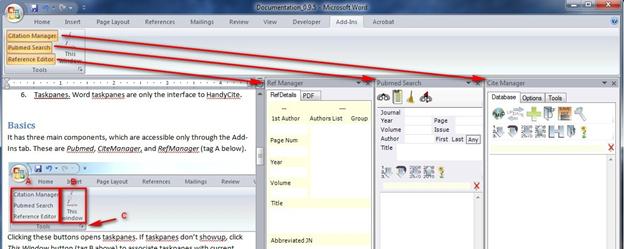
Taskpanes. Word taskpanes are only the interface to HandyCite.
Basics
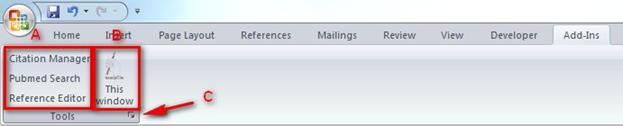
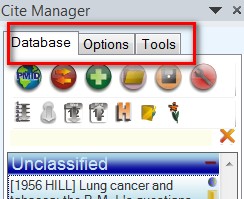
It has three main components, which are accessible only through the Add-Ins tab. These are Pubmed, CiteManager, and RefManager (tag A below).
 Clicking these buttons opens
taskpanes. If taskpanes don’t showup, click This Window button (tag B
above) to associate taskpanes with current word window. Only one word window
can have these taskpanes associated with it, so if you press This Window
button, it will close these taskpanes in another windows and open it in this
window.
Clicking these buttons opens
taskpanes. If taskpanes don’t showup, click This Window button (tag B
above) to associate taskpanes with current word window. Only one word window
can have these taskpanes associated with it, so if you press This Window
button, it will close these taskpanes in another windows and open it in this
window.
Pressing the corner button (tag C) displays version number and any maintains errors log for the session.
Three Taskpanes
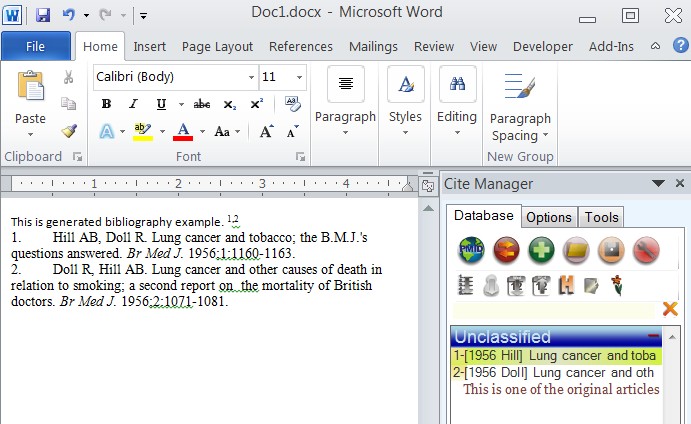
Citation Manager provides main interface for most of the tasks including
1. Insertion and removal of references in document. (Reference list is generated automatically at the end of document each time any of these actions is done in CiteManager)
2. Saving and loading of reference databases
3. Downloading, saving and opening pdf or html files of the references in the database list
4. Changing citation format.
5. Conversion of references from/to other software formats (EndNote, ReferenceManager)
6. Other features
Pubmed provides link to pubmed and help in finding references from pubmed. References found on this taskpane can be easily added to the database (CiteManager)
Reference Editor allows editing of a single reference in the database. For example changing author spelling, journal name, or adding information to new empty reference
Citation Manager
It has three tabs
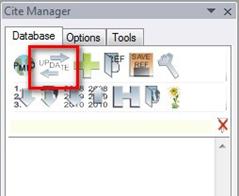
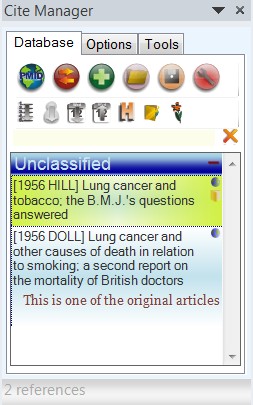
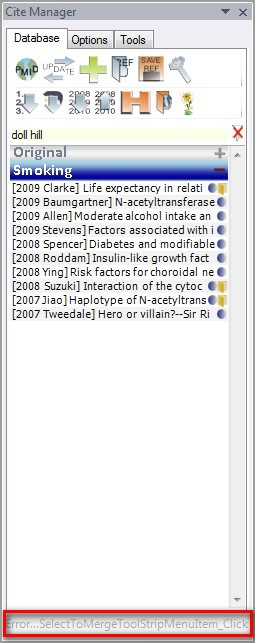
Citation Manager – Database Tab
is the main tab for handling references. It provides main interface for handling references.
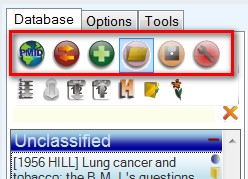
Buttons
1. PMID – Imports a reference from pubmed ID. It captures the Pubmed ID from clipboard. Clipboard can either include Pubmed ID, or web address of Pubmed reference e.g. http://www.ncbi.nlm.nih.gov/pubmed/5492550 or link to page with pubmed link (Copy link location from ‘All 5 versions’ and click PMID button to import reference from Google Scholar)

2. Update – This button updates
a. the document -(renumber and regenerate number list
b. and the database list - import references from document not in list and add numbering to the references in the list
pressing this button with Ctrl key enables/disables automatic updating of references when a reference is inserted in document
3. Add reference – Adds new empty reference and opens RefManager to edit the newly added reference
4. Open reference file – Opens the reference database file associated with current document. If there are some references already in the list, the database file references are added to the list. If no file is associated with the document, then opens the open file dialog to locate a file to link to the database
5. Save reference file – Saves the current reference list as the database file associated with current document. If the currently linked file name is different from the document file name, then in addition to updating the linked file, it creates a new file with the same name as document.
6. Run fixes – Runs multiple small fixes. Currenlty this includes
a. Remove duplicate references in document e.g. 6,6
b. Remove duplciate references in database list
c. Remove ‘[comments]’ from title.
These fixes are usually only required when references are imported from some other database format.
7. Sort references – There are four sort methods
a. Sort by index number
b. Sort by first author name
c. Sort by year – descending
d. Sort by year – ascending
8. Headings on/off – Turns headings on or off
9. Icons on/off – Turns icons (pubmed link and pdf file link) on or off
![]()
10. Refresh button – refreshes the database list (i.e. icons, headings and sort method)
11. Filter – sets filter for list. It searches all fields including notes. Each word is searched separately.
12. Remove filter – removes any filter and unhides any hidden references
List icons
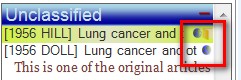
a. Globe - This icon is visible if a reference has Pubmed ID in database. It can be used in following ways
i. Click – opens the reference from Pubmed website in a taskpane
ii. Shift-click or Double-click– opens the reference from Pubmed in external default browser
iii. Ctrl-Click – opens the reference using custom string in a taskpane. The custom string can be changed in ‘Options’ tab. This can e.g. be used to open the reference at Pubmed site with your university link.
iv. Ctrl-Shit-Click – opens the reference using custom string in external default browser.
v. Right-click – opens shortcut menu
b. File – If a file for a reference exists in ‘ref’ subfolder of the current document, this icon is displayed. For example 1970Barner.pdf.
i. Click – opens the pdf/html in parallel taskpane
ii. Shift-click or Double-click – opens the pdf/html in external program
iii. Right-click – opens shortcut menu
The database list references can be selected by using Ctrl-click for dis-contiguous selection and Shift-click for contiguous selection. Unlike usual windows based selection, the selection is not lost with just clicking. Use <Clear Highlight…> option on right click menu to clear selection
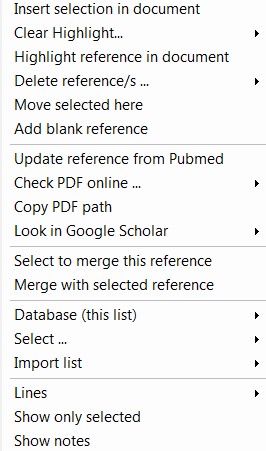
Right-click menu
1. Insert selection in document – Adds the currently selected reference in the document (at cursor)
The reference numbering is automatically
updated when a reference is inserted. In large documents (>200 inserted
fields and >200 references in database), this process may take a few
seconds. To enable/disable automatic update use Ctrl- ![]() button.
button.
Bibliography is automatically generated once a reference is inserted in document.
2. Clear Highlight - (default i.e. clicking on Clear Highlight rather than submenu = From list)
a. From list – removes any highlight or selection from list
b. Document – removes any highlight from fields in document.
c. Both
3. Delete references (default i.e. clicking on Delete references rather than submenu = From list)
a. From list – e.g. to remove unnecessary references from list select references and use this option
b. From document – any occurrence of highlighted /selected references is removed from document
c. From list and document – removes the references highlighted/selected in the list from both the document and list
d. From document selection – removes the highlighted/selected references from the selected text in the document
4. Move selected here – moves all the selected references after this reference
5. Add blank references – Same as Add reference button, adds a blank reference and opens reference editor.
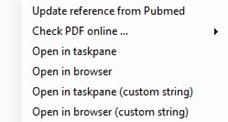
6. Update reference from Pubmed – Downloads the reference (in list and document) from Pubmed. . This is only possible if the reference has Pubmed ID
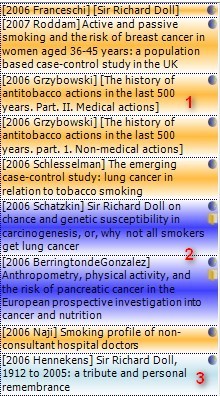
7. Check PDF online –- (default i.e. clicking on Check PDF online rather than submenu = selected references)
Checks to see if free PDF is available online. If available, it downloads it. The PDF is saved in the subfolder of the current document that begins with ‘ref’ e.g. \ref or \refFiles or \references. If no such folder exists it creates \ref subfolder. The file name is year+first author name e.g. 1970Barner.pdf. When Icons are turned on (on/off button), HandyCite looks into this folder to see if such file exists. If it does, then it turns the folder icon on. If there are two different references with same name than an alphabet can be added to year e.g. 1970bBarner (in RefManager). This will create a separate file. This alphabet will not be ignored when generating reference list.
The color coding used while checking for free PDF is 1. Orange – free PDF not found, 2. Blue – free PDF found (also PDF file link icon appears), 3. Light blue – File being checked.
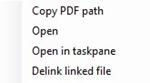
8. Copy pdf path – Use it to put the proposed path for PDF of (one) selected reference in clipboard.
9. Look in Google scholar – (default = browser)
Creates a string of the reference and submits to Google scholar. You can also search 'cited by' in google scholar. The results can either be viewed in pubmed taskpane or in browser.
10. Select to merge this
reference & Merge with selected reference – In case two references exist
for same reference; they can be merged using this option. This will open a form
(see below). Field on the right of the form will replace both references (both
in list and document). 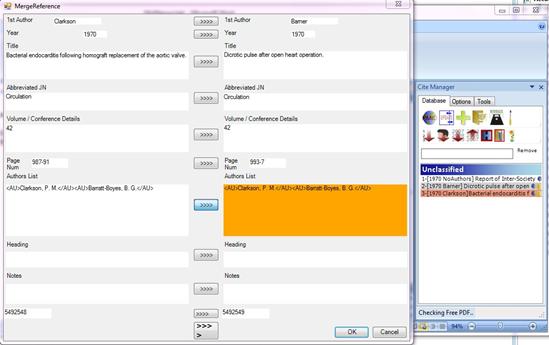
11. Database (this list)
a. Save – same as ‘save reference file’ button
b. Load – same as ‘load reference file’ button
c. Load file – loads a database reference file that is not associated with current document
d. Get references from document – generates database list from references used in document
e. Get reference file – Recursively loops through a folder and all subfolders to see if the highlighted/selected references pdf exists. If it does, it copies it to the ‘ref’ subfolder of current document. This can be used to find previously downloaded pdf files. However, depending on the folder size, it may take a while and hold system.
12. Select – highlights/selects
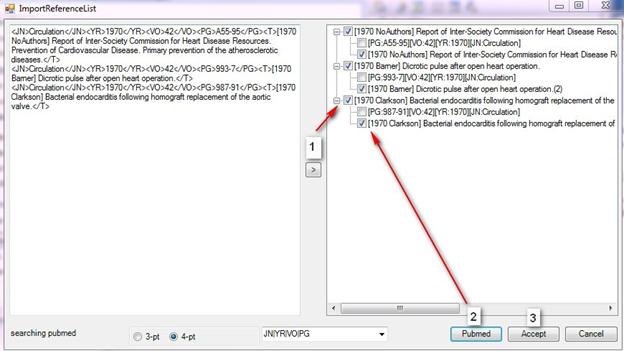
13. Import list – Opens a form that tries to find the references on Pubmed based on year, first page, volume and journal name (4-pt). 3-pt option ignores journal name. It can work on highlighted references or a list can be pasted from clipboard. If references are copied from a PDF file, then line breaks can be fixed using ‘Fix PDF’ option from right click context menu. After pasting the list in the left side, -1- recognizes the key fields, -2- Pubmed button, finds the checked references on Pubmed using key fields (3-pt ignores journal name), and -3- Accept button closes the form and imports all checked found references to the database list.
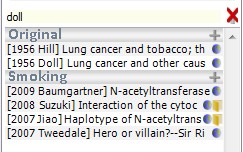
14. Lines – the reference list can be displayed in single lines (default), double lines or full title (as below)
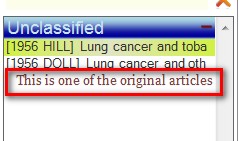
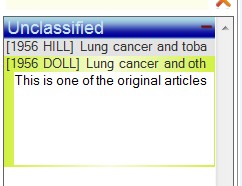
15. Show notes –Display your custom notes for the reference within the list. Press ctrl-enter to edit notes (ctrl-enter to save, escape to exit without saving). Need to 'Show Notes' before allowing editing.
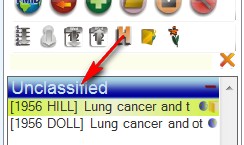
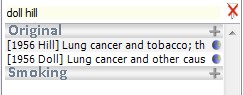
Headings
Headings can be collapsed or uncollapsed and have right-click menu
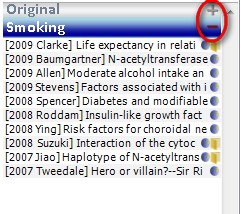
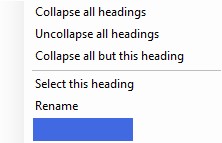
The blue box displays the heading name and can be used to rename the heading.
Messages
The bottom of Cite Manager tab displays messages. New message is highlighted for few seconds then are grayed out. Error messages are archived in the log. (old image)
Citation Manager – Options Tab
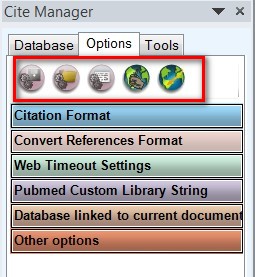
1. Save settings button– Shows a save file dialog to save the ‘citation format’ and ‘convert references format’ settings as a settings file.
2. Import settings button- Shows a load file dialog to load the ‘citation format’ and ‘convert references format’ settings as a settings file.
3. Display settings button – Opens a form that displays current settings. These can be copied or new settings can be pasted.
4. Go to online documentation
5. Check if a new version is available
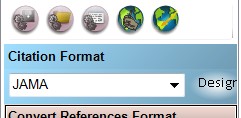
Citation format section – Choose a citation format or design your own. (see Citation Format below)
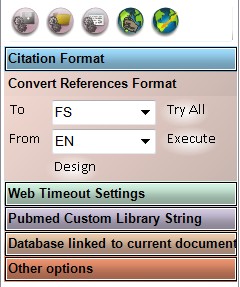
Convert References Format – Use for conversion from EndNote or Reference Manager to HandyCite. Can also convert TO Endnote format. Use Design option to fine tune the matching if it is not capturing some field.
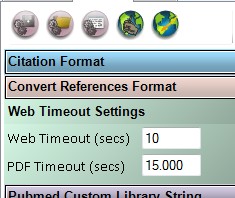
Web Timeout Settings. Increase these times if web time out is reached before a reference is downloaded. These settings (3 sec and 15 sec) work good for a fast connection.
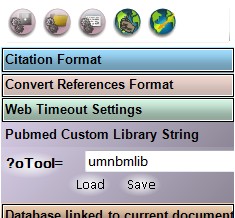
Pubmed Custom Library String – To access your library directly, this string is used when Ctrl-globe icon is clicked in database list. Pubmed ID is added to the end of the string.
Check https://quosa.org/pubpdf-institutions to find code for your institute.
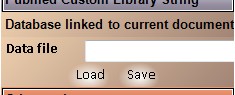
Database linked to current database – Change the reference database text file linked to current word document
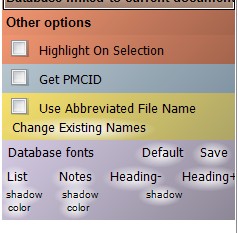
Other options
Highlight on selection - Highlights references in database list that exist in current document selection
Get PMCID – Attempts to retrieve PMCID when a reference is refreshed. (right-click menu > update reference from pubmed)
Use Abbreviated File Name – Do not add title initials to PDF file names. Checking this option will make it difficult to uniquely link references with their corresponding PDF files.
Database fonts – Modify the appearance of fonts in database list
Citation Manager – Tools Tab
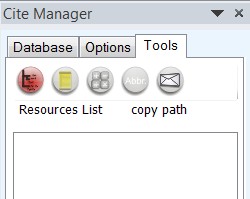
Five groups of tools
- Resource list – This is default tool. Clicking resource shows directory and file of the folder the document is in. You can open files/folders directly (double clicking) or copy path (right-clicking)
- My notes – displays custom notes for the document. By entering your unique key, you can save/retrieve your notes for the document. These notes are saved within the document. So you can retrieve them even after sending/receiving by email. These are not saved within the text of the document and so are invisible to others
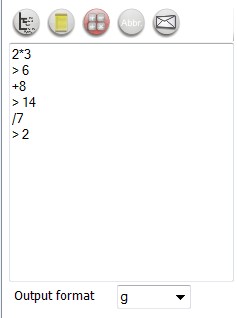
- Calculator is a quick text based calculator e.g. 2*3 <enter>
- Management of Abbreviations
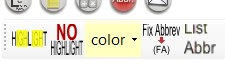
a. Highlight button – highlights all occurrences of selected text in document. It is useful for finding abbreviations and check if they are defined before usage.
b. No highlight – removes highlighting from document
c. color of highlight
d. FixAbbrev – Fixes selected abbreviation. E.g.
MRI was performed on every patient. Patient’s with no magnetic resonance imaging (MRI) were excluded.
Will be replaced with
Magnetic resonance imaging (MRI) was performed on every patient. Patient’s with no MRI were excluded.
e. attemps to list abbreviations in document
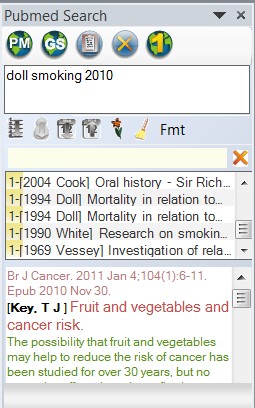
It is used to find references on Pubmed. Search term is entered (in Pubmed search format) in the search box (7) and search results appear in results list
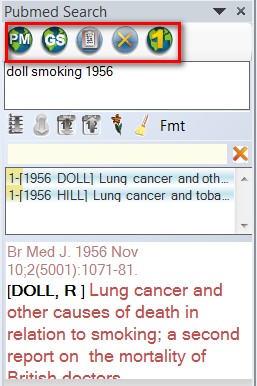
- Search pubmed
- Search google scholar
- Search on pubmed what is in clipboard (copied from somewhere else)
- Clear search criteria
- Single citation matcher (for pubmed)
Search term to search Pubmed – Keyboard shortcuts for this box
a. ‘Enter’ – run query
b. Ctrl-1,A, J, D, Y, V, P, T – enters a Pubmed search term and places cursor before the search term
c. Ctrl-Q – Enter paranthesis and quotes
d. Ctr-X – clears the whole field, Ctrl-Z – removes the last part of the search term
For google scholar search you can use year range and total references in text e.g 'doll smoking 1990-2000 n=50'
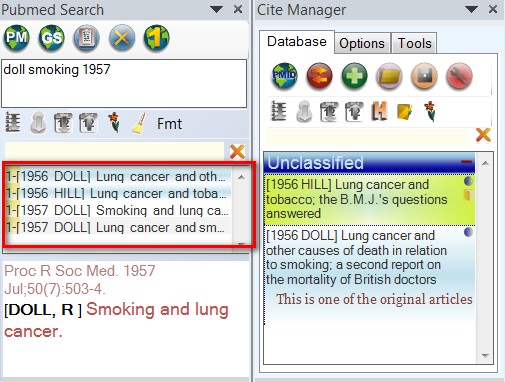
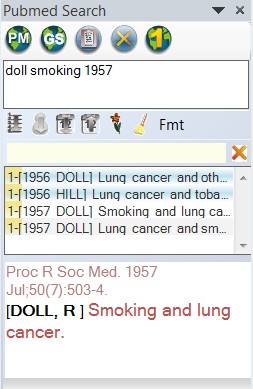
Results list – light blue highlight indicates that the reference already exists in your list. Yellow index indicates how many times this reference was found (if you did multiple searches). Right click to transfer references to your database, or to convert google scholar search results to pubmed type references.
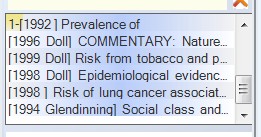
Dark blue highlight indicates
that the reference is from google scholar and needs to be imported from pubmed (right-click>Convert to pubmed) before importing it to database.
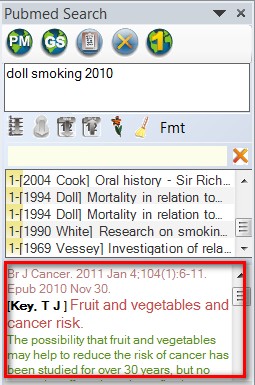
Show formatted result – displays source, title, abstract etc as per your custom format (Fmt button)
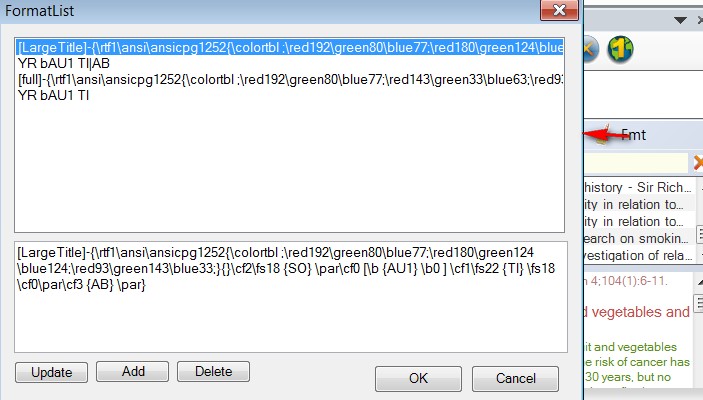
The format at the top of the list is your custom format. Double click on any format to bring it to the top of list. Notice abbreviations SO,AU1,TI,AB in the format. Other abbreviations include PMID, YR, AU. This is rich text format. Colors are listed in sequence and used as \cf1 \cf2 etc. Need empty elipses {} to use format for a list of multiple references. Best is to copy/paste existing format and modify it.
- examples -
[LargeTitle]-{\rtf1\ansi\ansicpg1252{\colortbl ;\red192\green80\blue77;\red180\green124\blue124;\red93\green143\blue33;}{}\cf2\fs18 {SO} \par\cf0 [\b {AU1} \b0 ] \cf1\fs22 {TI} \fs18\cf0\par\cf3 {AB} \par}
- [full]-{\rtf1\ansi\ansicpg1252{\colortbl ;\red192\green80\blue77;\red143\green33\blue63;\red93\green143\blue33;}{}\cf2\fs18 {SO} \par\cf0 [\b {AU1} \b0 ] \cf1 {TI} \cf0\par\cf3 {AB} \par}
- YR bAU1 TI|AB
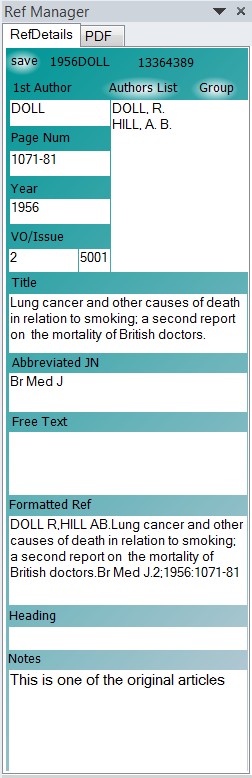
Reference Editor Taskpane
It is used to edit a reference (new or already existing reference). Currently selected reference from Cite Manager is automatically displayed in this taskpane if the taskpane is visible. If taskpane is hidden, double-click on the reference to show it in the ref manager. It has a second ‘PDF’ tab, that is NOT automatically updated by Cite Manager selection. So both tabs may be displaying different references. The ‘PDF’ tab displays PDF file or Pubmed web page by clicking icons in Cite Manager.
To scroll the RefDetails use hand grab on green part and move.
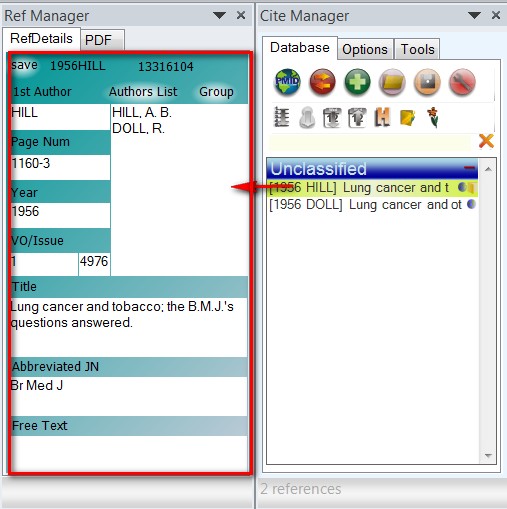
1. The background turns red whenever any change is made in any of the fields.
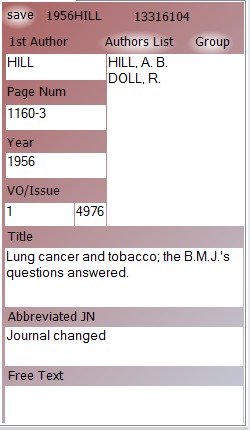
Clicking save label accepts the change and updates the database and document. To update the database file save it (save reference button in CiteManager)
1stAuthor information is not used for citing, but only used for generation of list and identification.
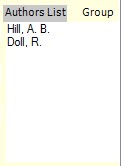
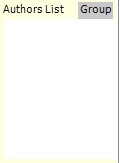
2. Author’s List vs Group list – In case if pubmed list the trialist’s group, it will show up in the Group instead of the Author’s list. If ‘Group’ is not empty it is used instead of Author’s list for citing reference. Click Author’s List or Group to toggle between the two.
3. Free text – If this field contains any text, then this text is used instead of creating a format and all other fields are ignored. Entering some information in 1st Author, Year and Title fields however helps in listing and identification of the reference. This can be used for citing conferences, books, websites.
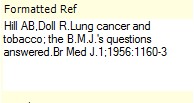
4. Formatted Ref – For quick check a formatted reference is created. However, the actual citation may differ.
5. Heading
– Use this to organize your references. To create a new heading, enter the
heading name in one reference. With headings turned ‘on’ ![]() in
the database list, other references can be dragged to the newly created heading
group. After creating a new heading, a refresh
in
the database list, other references can be dragged to the newly created heading
group. After creating a new heading, a refresh![]() is required
is required
![]()
Reference Editor Taskpane Pdf Tab
This tab allows visualization of PDF files and Pubmed pages.
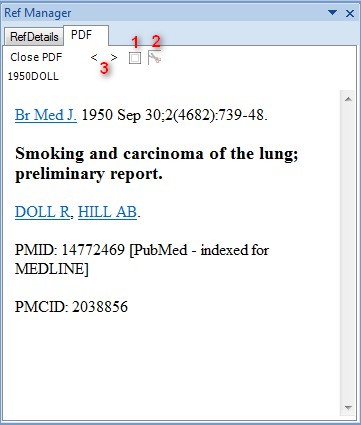
1. Zoom in and out (for simplified Pubmed webpage)
2. Trim. Pubmed webpage to view only the abstract.
3. Navigate
Citation Format
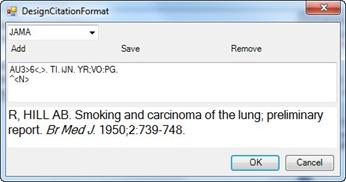
HandyCite can create three types of citation formats
1. Serial index numbering in document and in reference list – index numbering sorted by citation order in document (e.g JAMA, NEJM)
2. Index numbering in document and alphabetical author names in reference list – index numbering sorted by author name (e.g. Neurosurgery)
3. Author name +/- Year in document and same in reference list – sorted by author-year combination.
Each style is defined in three lines.
First line defines the formatting of reference in reference list. In example below AU3>6 means to list 3 authors if more the 6. <,> means to use comma as separator in author list. Other formatting elements are used as such. iJN means to italicize journal name.
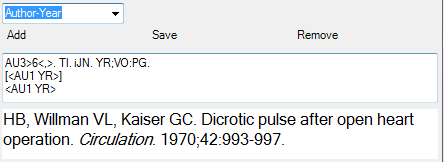
Second line defines the format of reference in document e.g.[<AU1 YR>] would become [Barner 1970] and [<N>] would become [1]. For superscript use ^ e.g. ^<N> would become 1
Third line defines the sorting scheme. If ignored it will be order of citation.
Ignore minor errors in the generated citation in this form as this is just a quick and dirty approximation of what will be generation in the list.
fks-soft.com
Last update this page:Feb 7, 2010